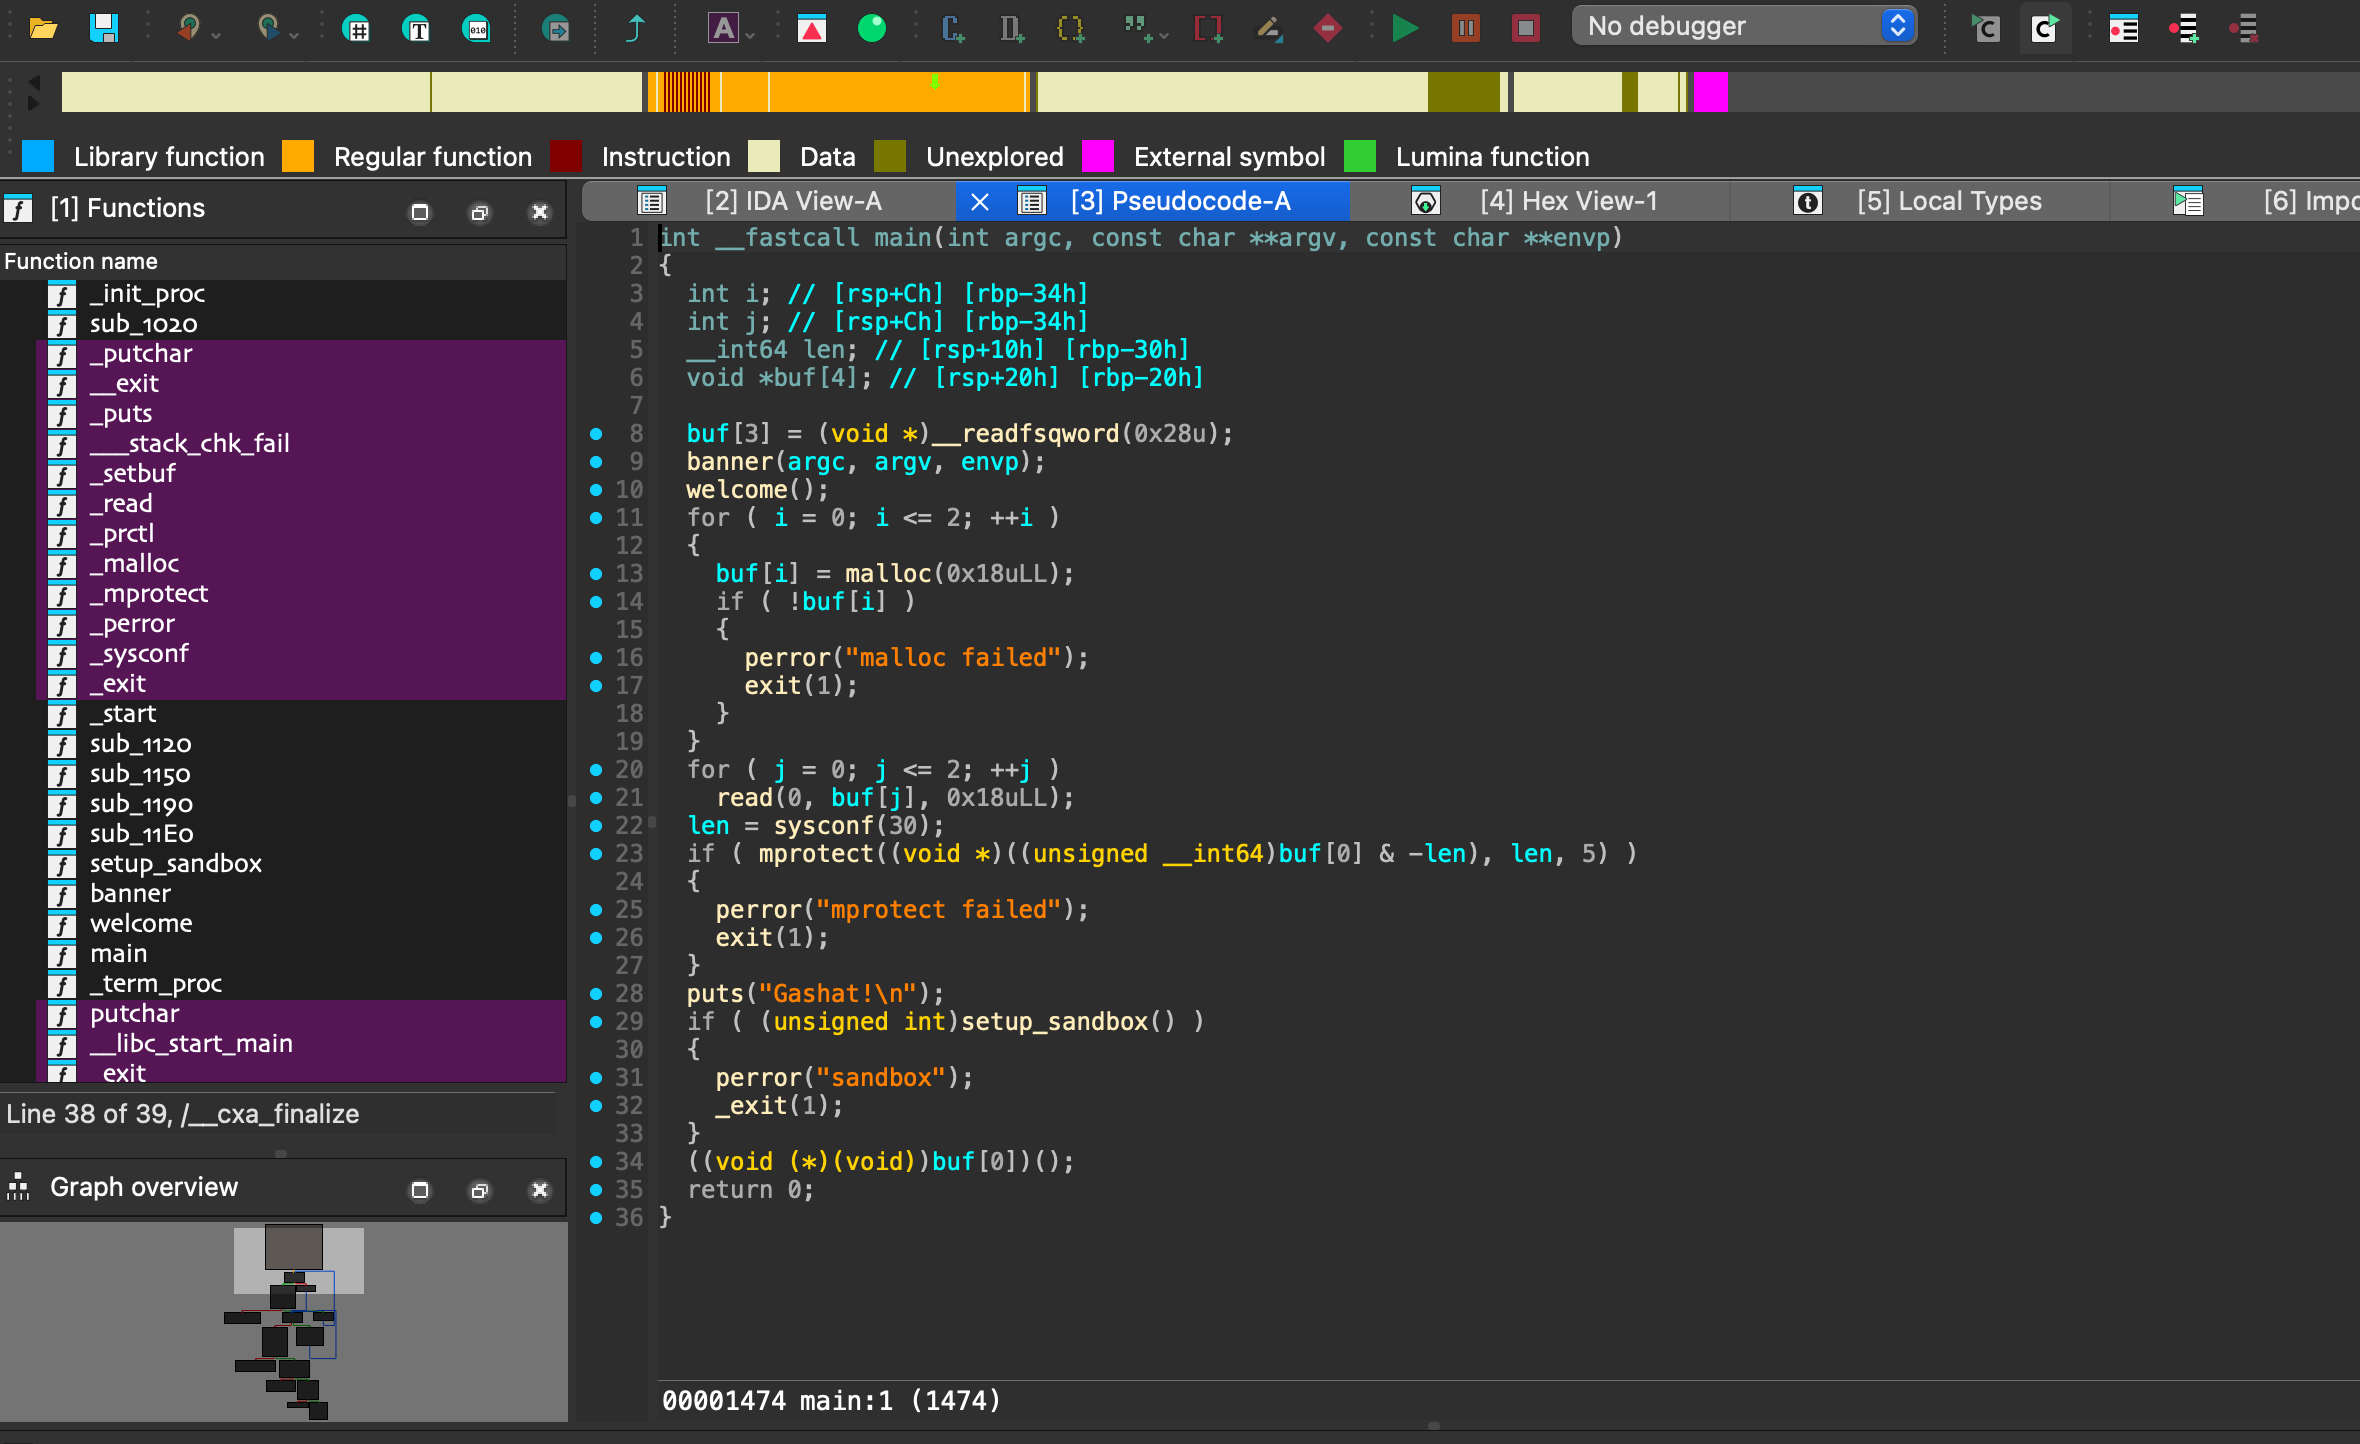
defstaylower(data): if data == 0: returnb''# 或者返回 b'\x00' 如果你需要处理0 ret = b'' iterator = [] # 提取低4位 temp = data while temp != 0: iterator.append(temp & 0xf) temp >>= 8 # 组合字节 for i inrange(len(iterator) // 2): a = iterator[2 * i] b = iterator[2 * i + 1] result = (a << 4) + b ret += bytes([result]) return ret
/* Base of the topmost chunk -- not otherwise kept in a bin */ mchunkptr top; //指向top_chunk
/* The remainder from the most recent split of a small request */ mchunkptr last_remainder; //最近unsortedbin分配剩余的chunk地址
/* Normal bins packed as described above */ mchunkptr bins[NBINS * 2 - 2]; //记录bins的信息
/* Bitmap of bins */ unsignedint binmap[BINMAPSIZE];
/* Linked list */ structmalloc_state *next;//指向arena链的后一个arena
/* Linked list for free arenas. Access to this field is serialized by free_list_lock in arena.c. */ structmalloc_state *next_free;//管理未被线程使用的空闲 arena
/* Number of threads attached to this arena. 0 if the arena is on the free list. Access to this field is serialized by free_list_lock in arena.c. */ INTERNAL_SIZE_T attached_threads; //记录使用此 arena 的线程数量
/* Memory allocated from the system in this arena. */ INTERNAL_SIZE_T system_mem; INTERNAL_SIZE_T max_system_mem; };
/* First address handed out by MORECORE/sbrk. */ char *sbrk_base; // sbrk堆的起始地址
#if USE_TCACHE /* Maximum number of buckets to use. */ size_t tcache_bins; // tcache bin数量 size_t tcache_max_bytes; // tcache最大字节数 size_t tcache_count; // 每个bin的chunk数量 size_t tcache_unsorted_limit; // tcache未排序限制 #endif };
/* There are several instances of this struct ("arenas") in this malloc. If you are adapting this malloc in a way that does NOT use a static or mmapped malloc_state, you MUST explicitly zero-fill it before using. This malloc relies on the property that malloc_state is initialized to all zeroes (as is true of C statics). */
typedefstructtcache_entry { structtcache_entry *next; /* This field exists to detect double frees. */ uintptr_t key; } tcache_entry;
/* There is one of these for each thread, which contains the per-thread cache (hence "tcache_perthread_struct"). Keeping overall size low is mildly important. Note that COUNTS and ENTRIES are redundant (we could have just counted the linked list each time), this is for performance reasons. */ typedefstructtcache_perthread_struct { uint16_t counts[TCACHE_MAX_BINS];// 每个bin的chunk计数 tcache_entry *entries[TCACHE_MAX_BINS];// 每个bin的首个chunk } tcache_perthread_struct;
 。题目中有些关键的栈操作函数如果不在ida中转化变量为结构体还是很难逆的。
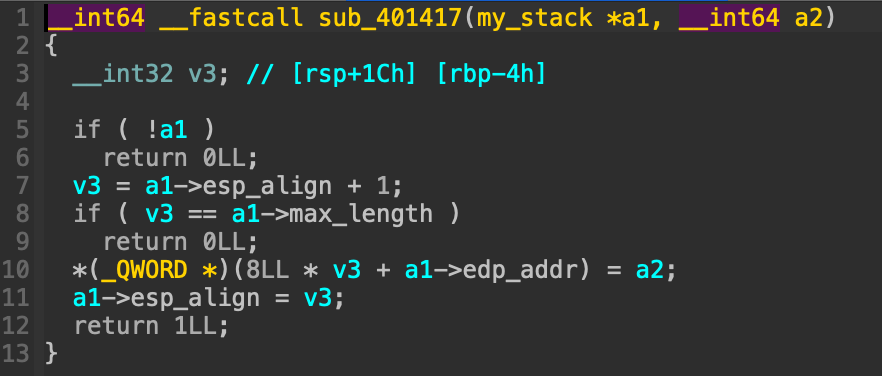 这里实现了栈的push功能。关键逻辑还是在解析函数中,对于存储opcode的栈依次弹栈并switch_case判断opecode跳到不同操作函数中(已经算是非常直接的解析逻辑了。
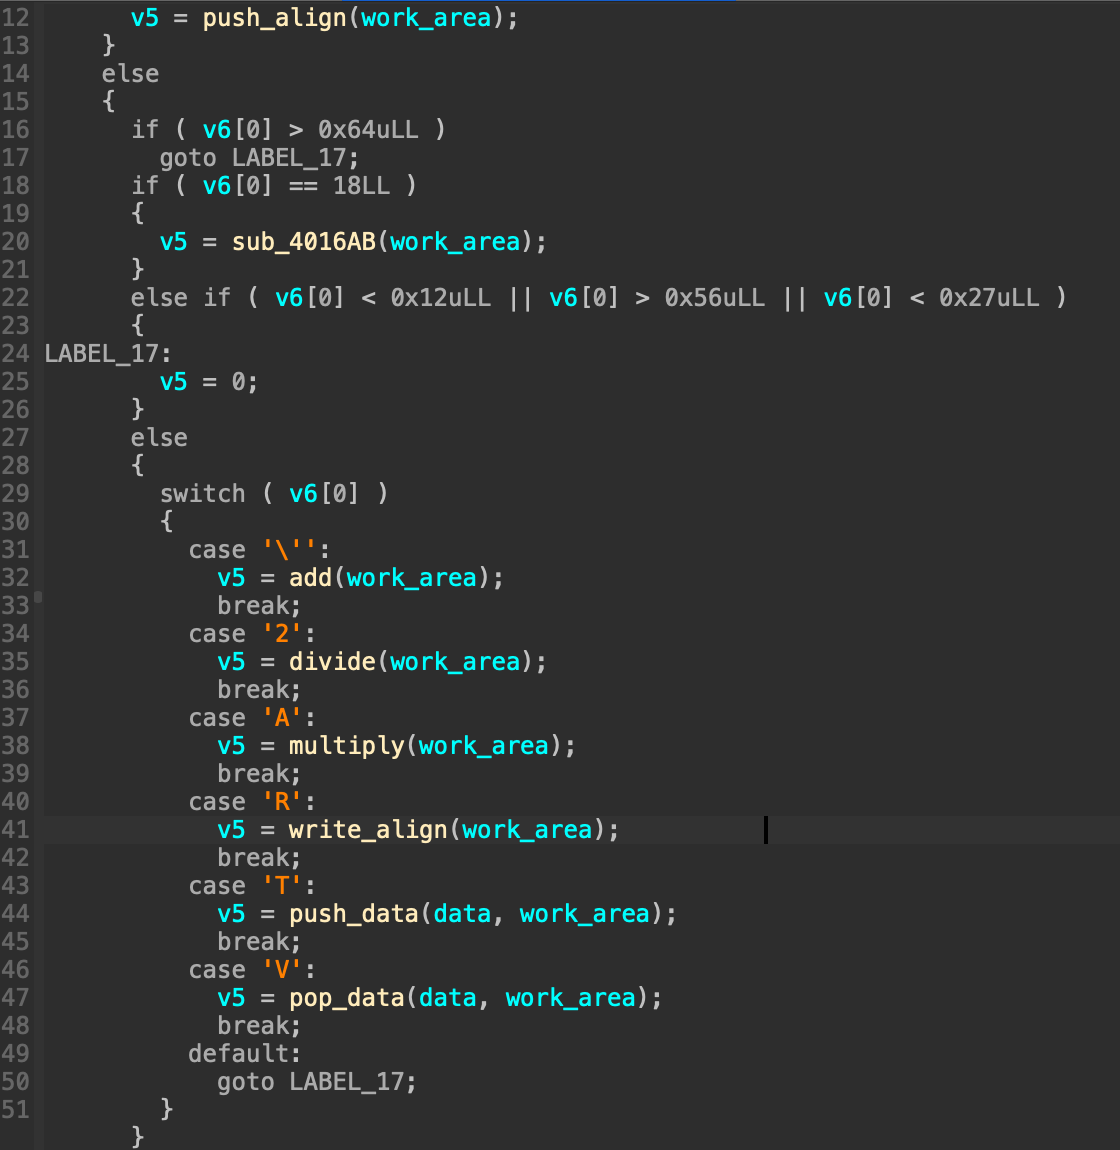


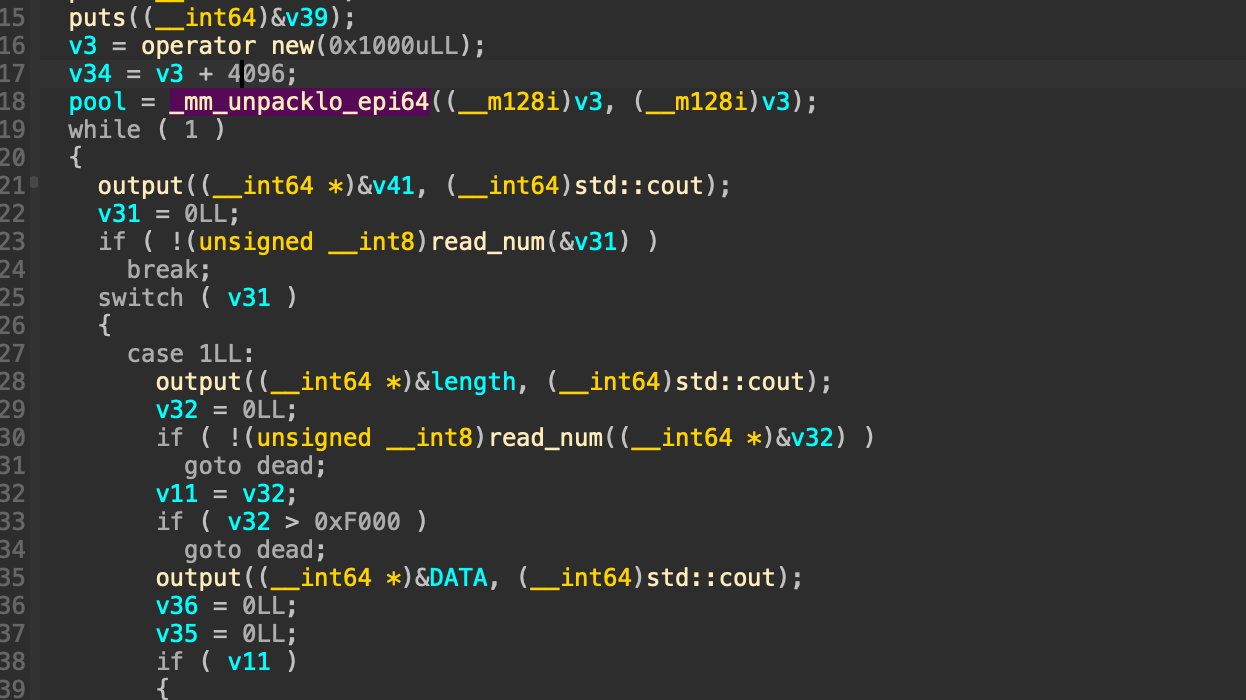 这里在菜单循环前new了一个0x1000大小的堆块,并将栈变量指向它。这是一个预分配的内存池,栈上存在0x10的变量分别存其基址以及游标(代表内存池的使用情况)。其实内存池与我之前接触的大部分堆题中的bss段存堆信息的作用是一样的。将这些信息存在动态内存中更加灵活,实现可拓展性。当然,如果我们能够通过构造堆overlapping或者堆溢出能控制这个内存池中的数据那么就达成了任意地址读写了。这里的内存池存在extend函数,总体逻辑就是如果游标以及到堆块的尾部的话就申请2倍自己大小复制原先内容然后free掉自己。这也一定程度上允许我们控制对应堆块的相对位置(本题没有用到)。
 输出逻辑的判断是对于每两字节判断是否同时为0作为输出结束标识。


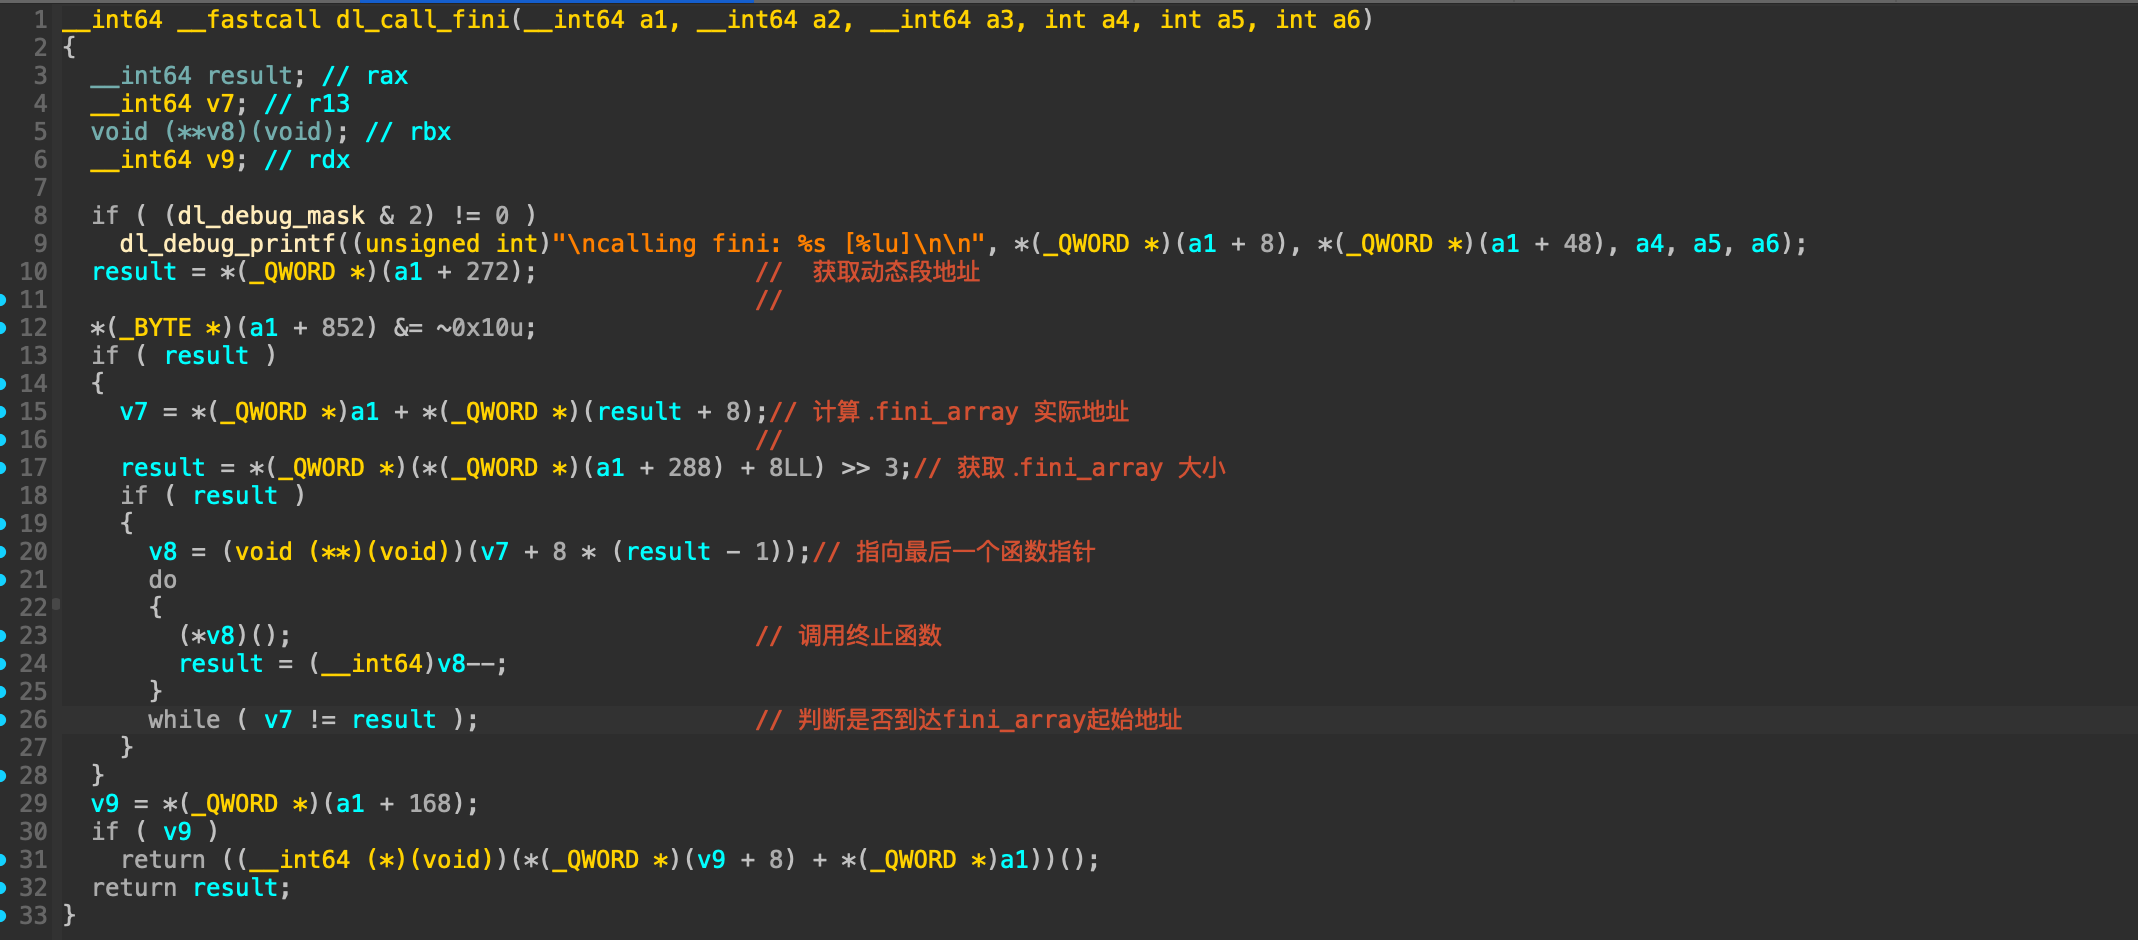
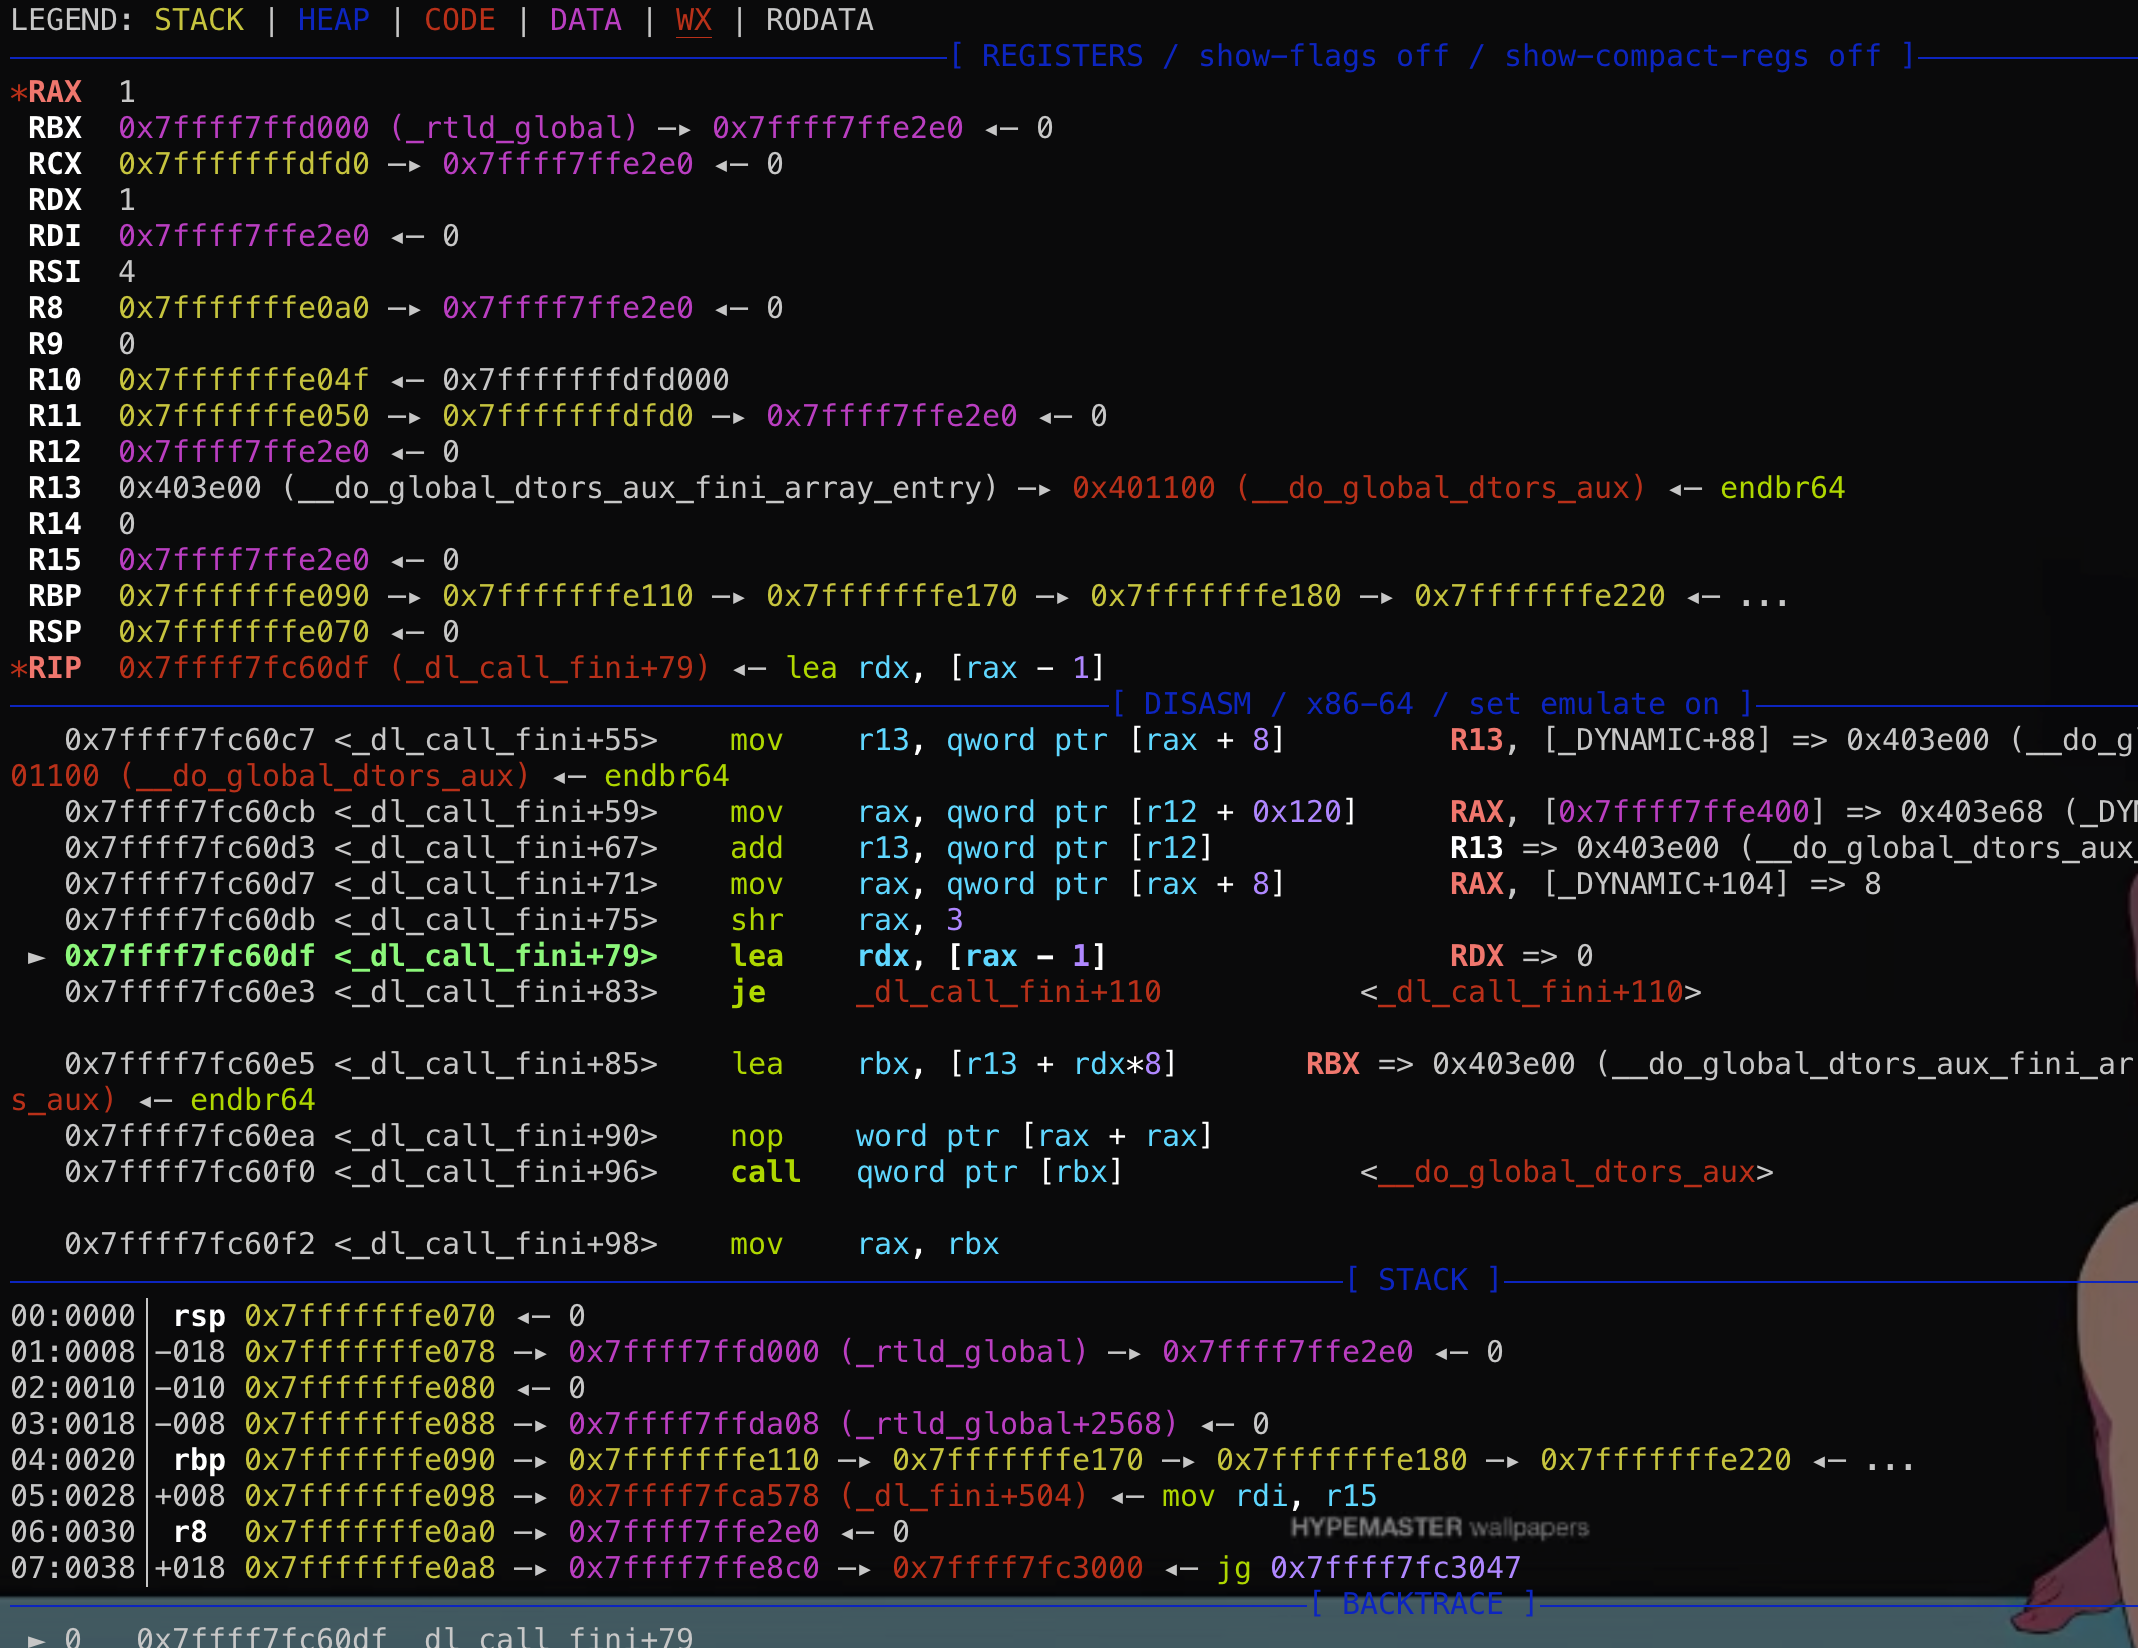
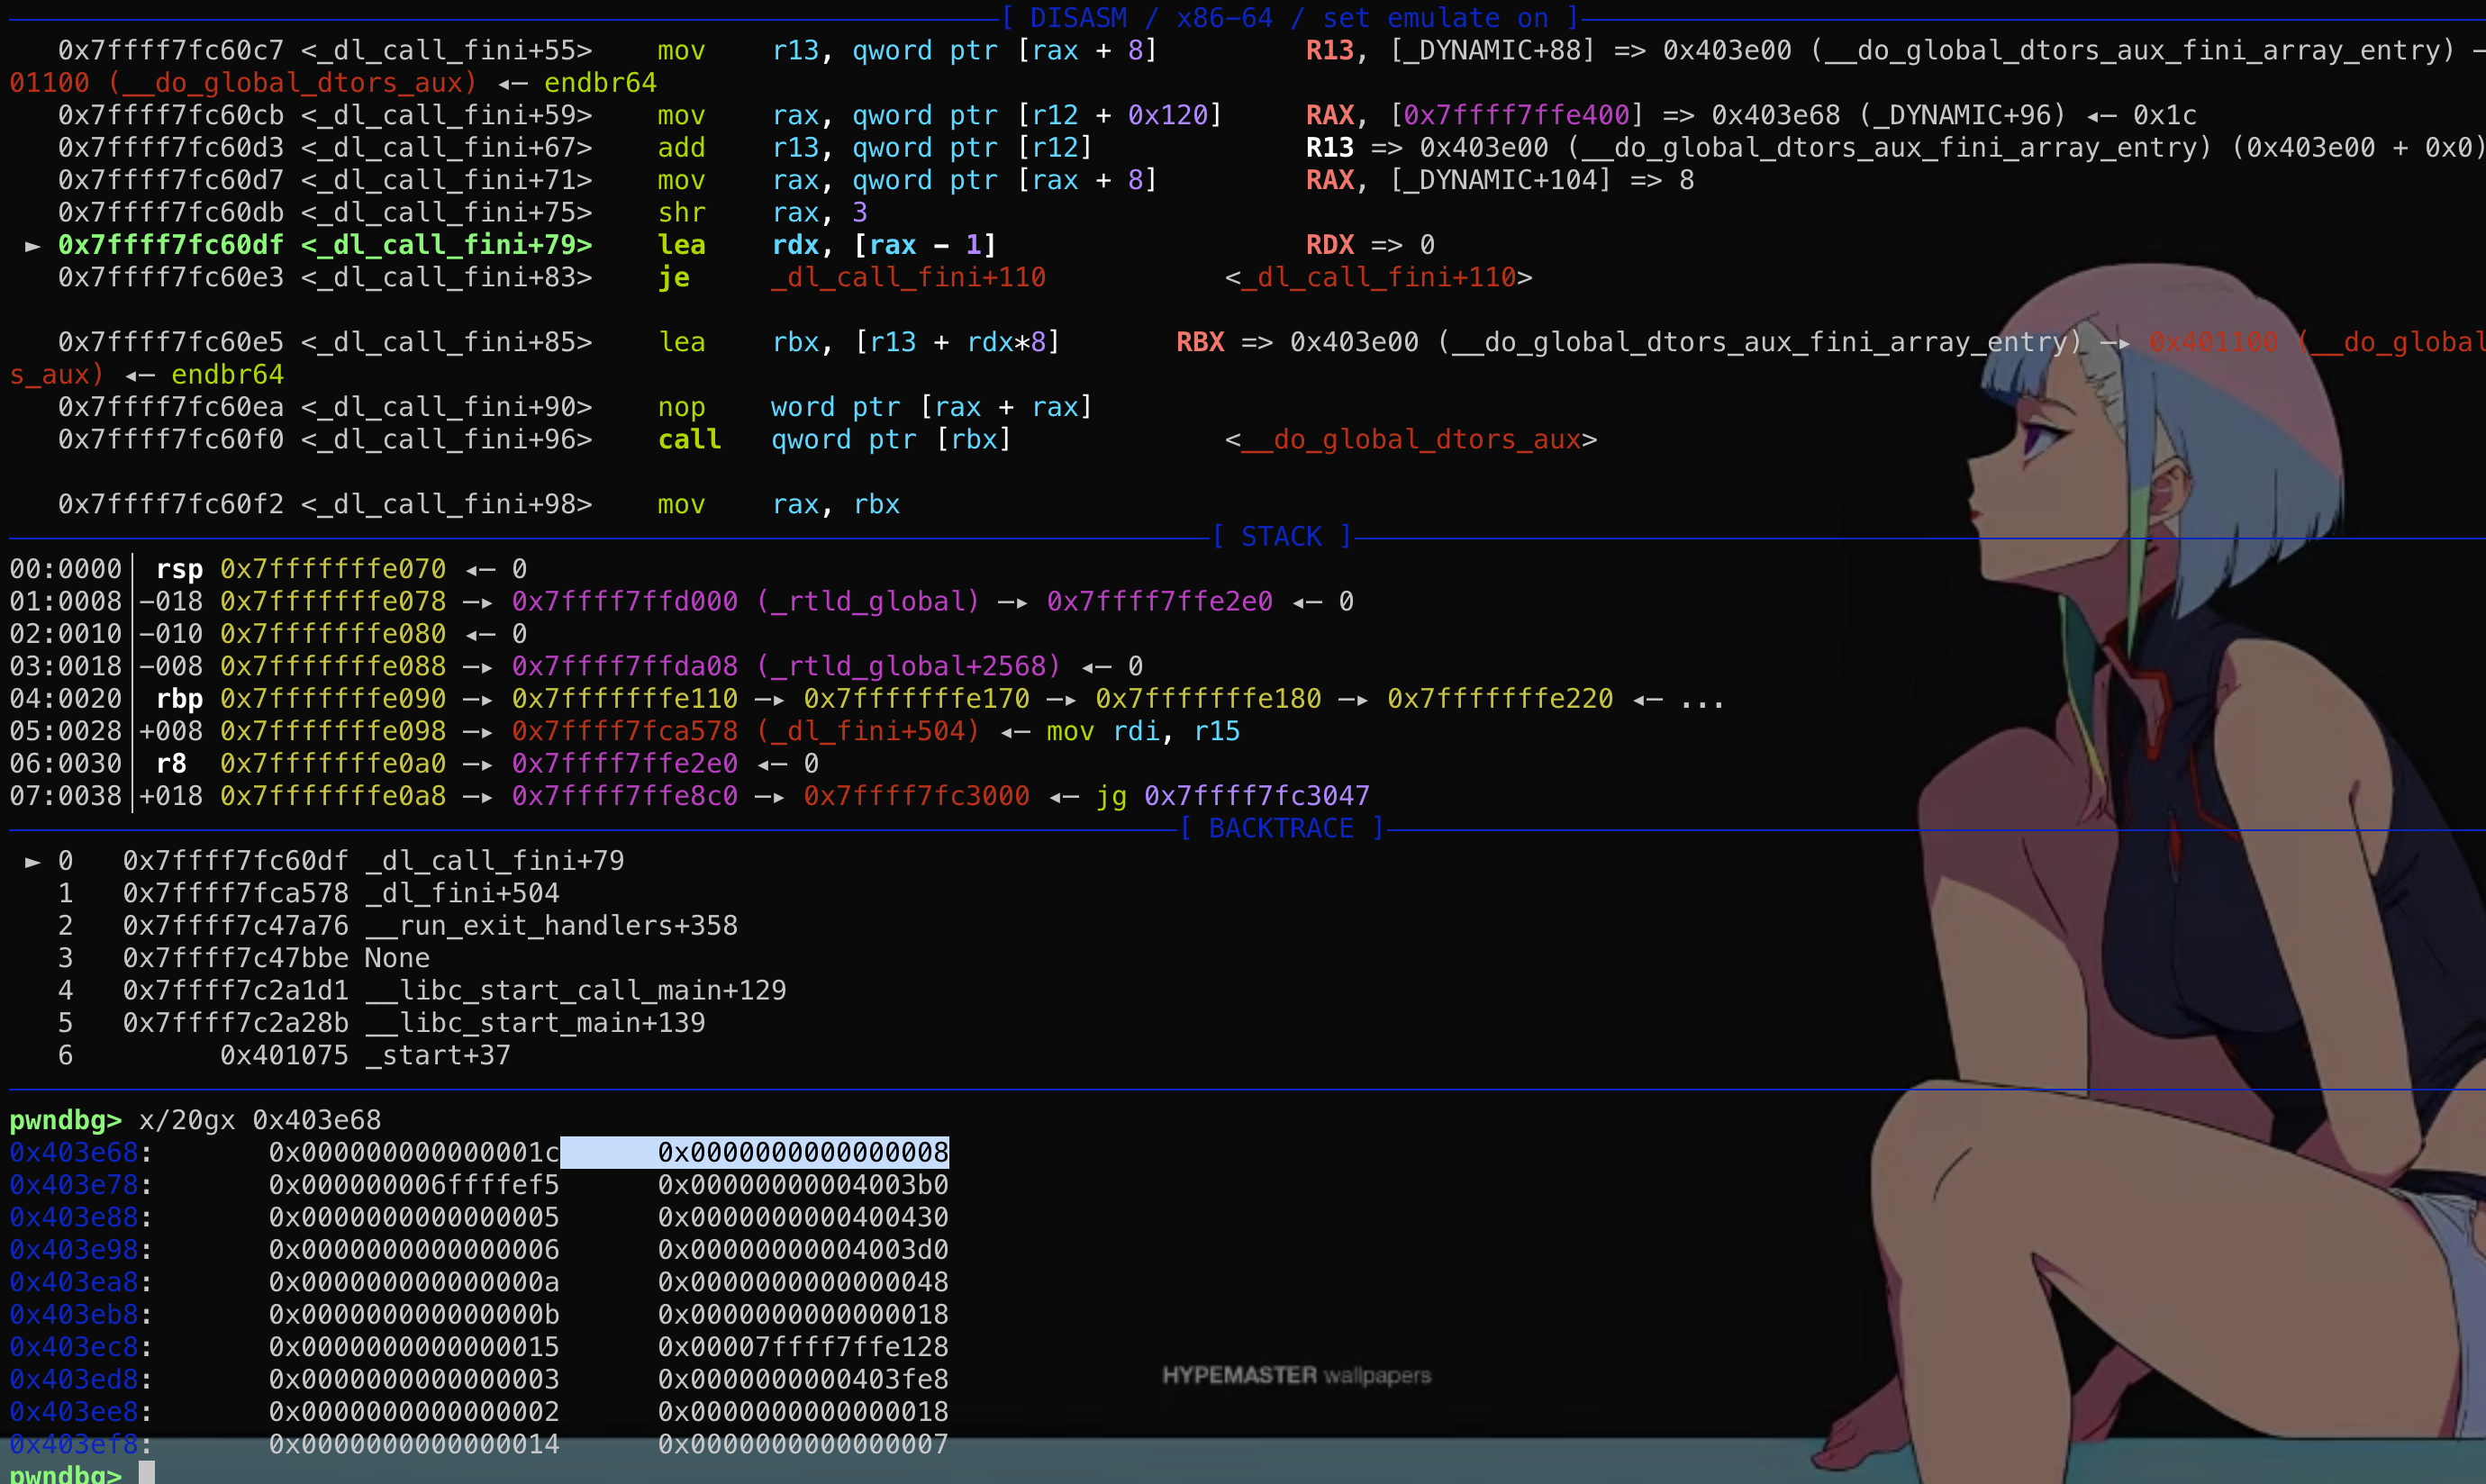
 然而这个结构体在main函数的时候其实是保存在栈上的!
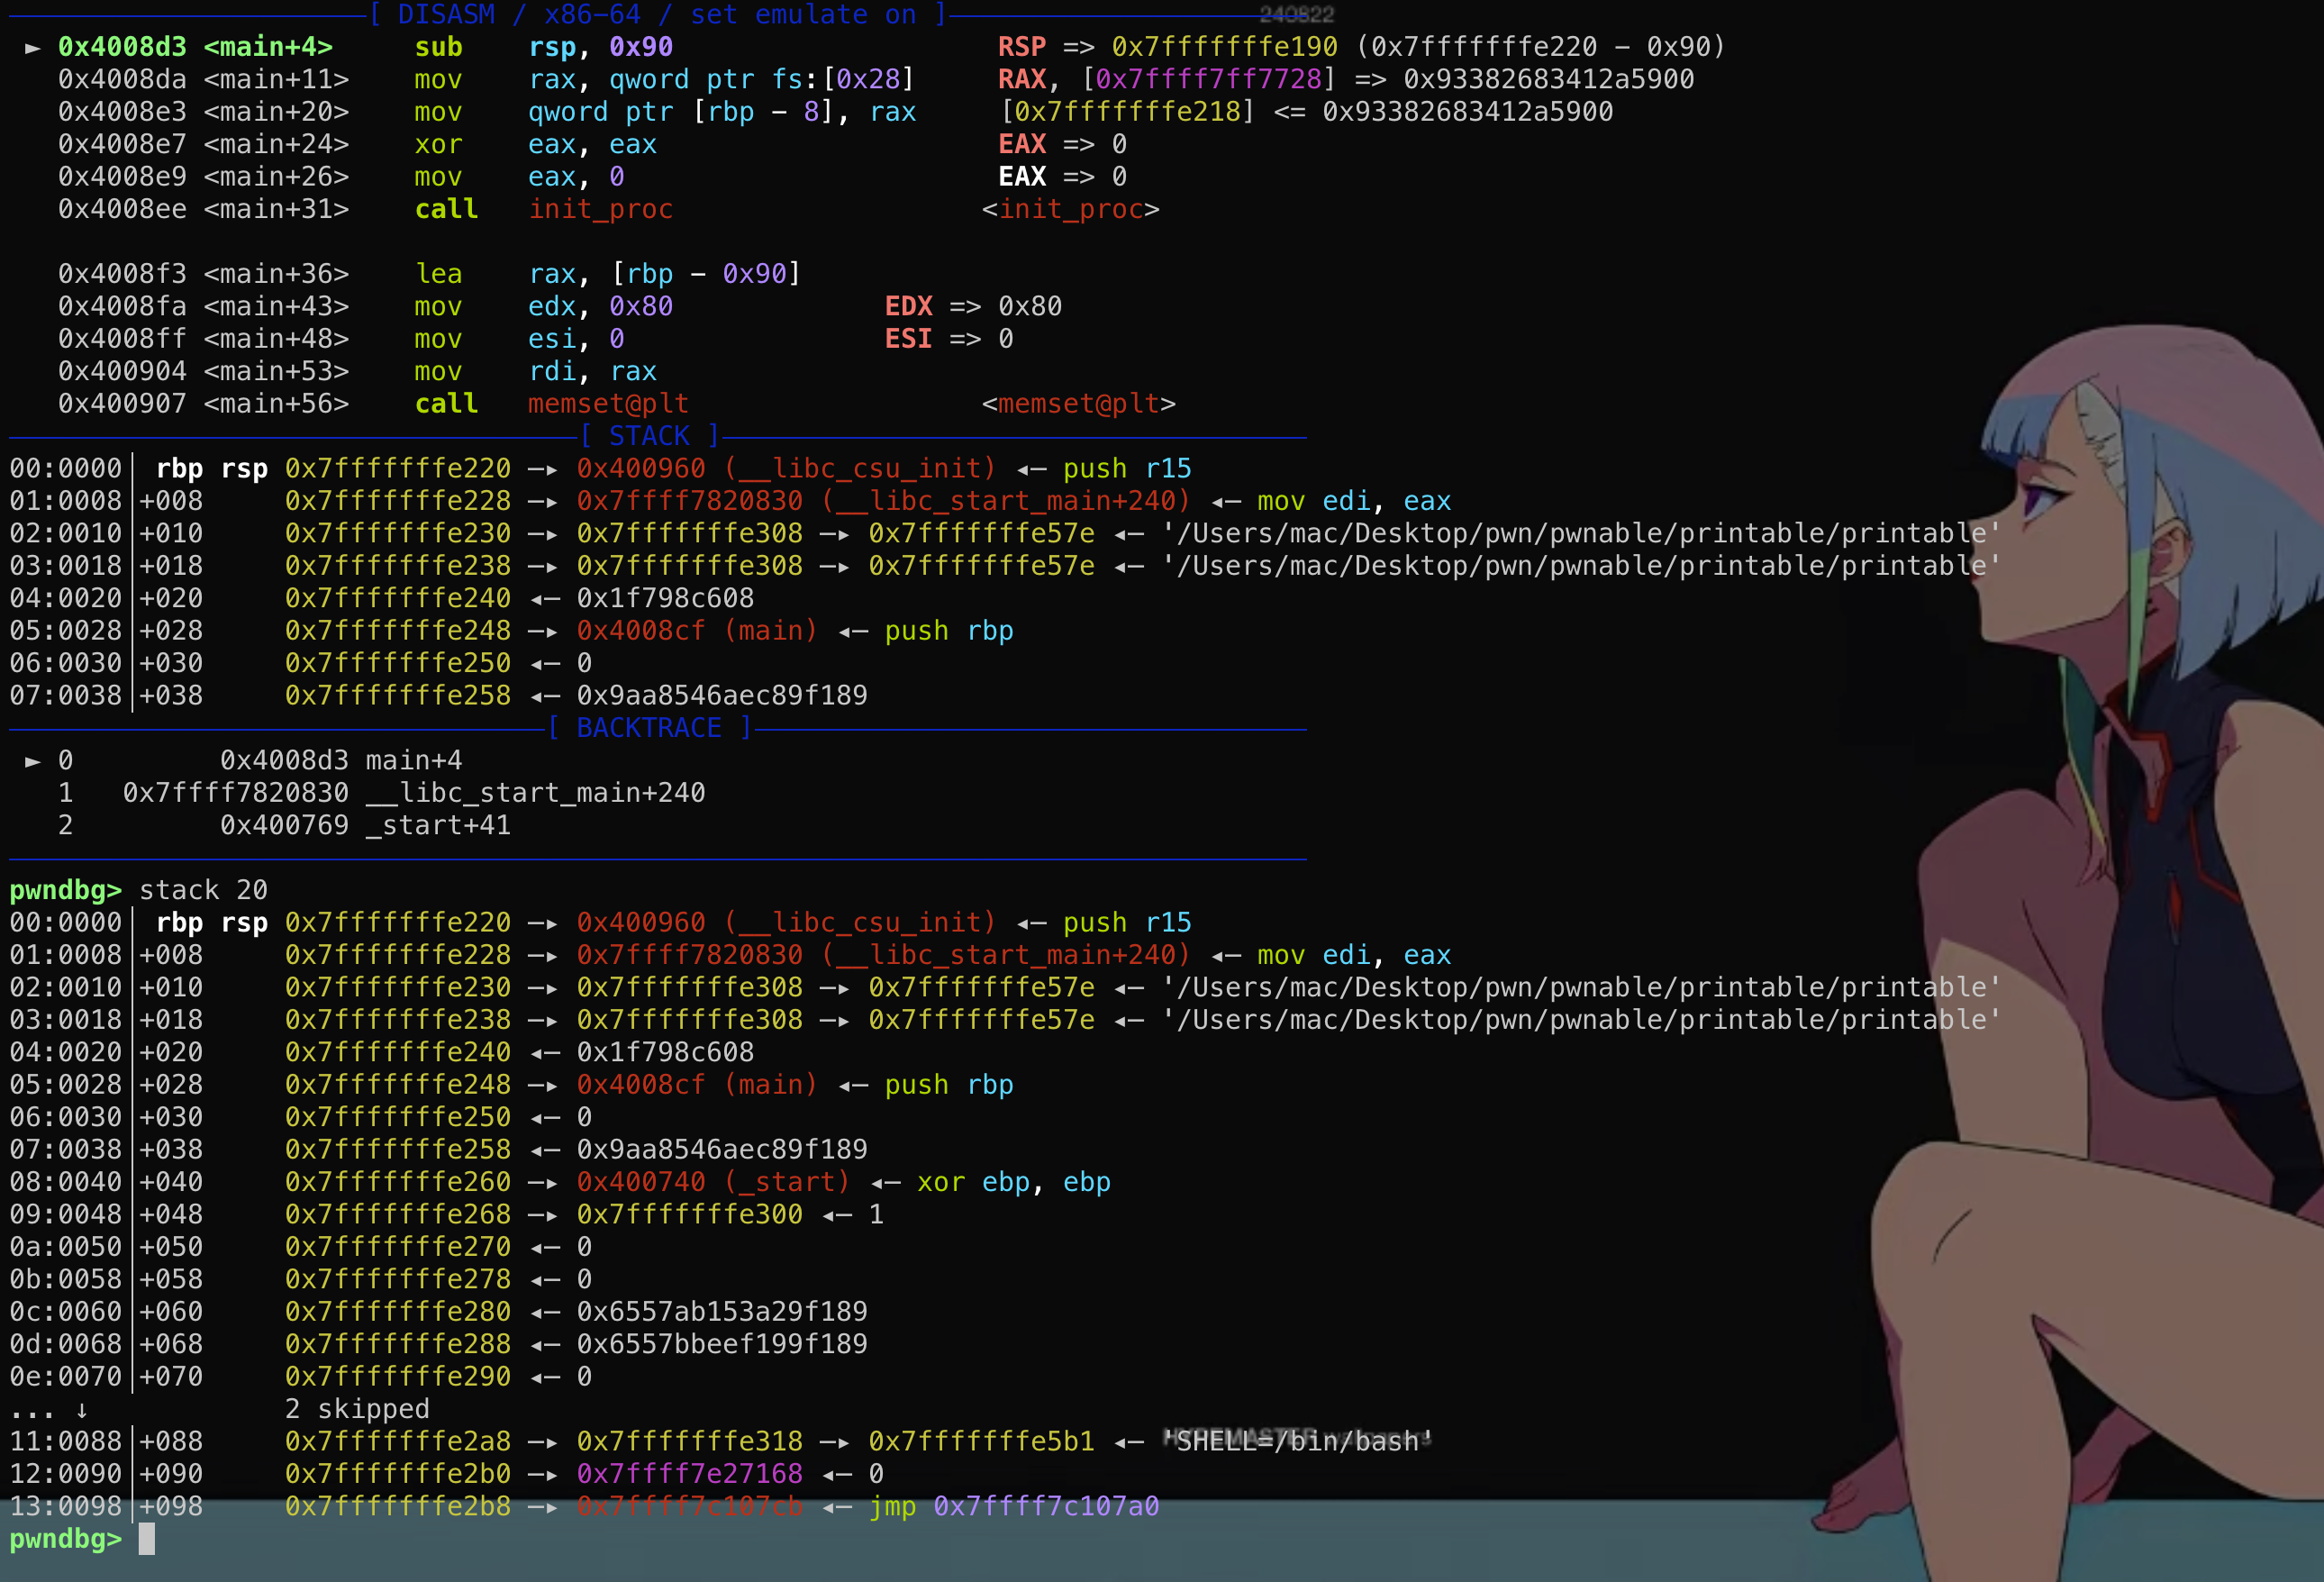 这段结构体是可写的,那么如果能够通过格式化字符串等漏洞往栈上这个结构体内固定偏移写入数据,就能控制fini_array到可控地址从而使劫持exit后到程序流!